


Instructions for Constructing the NBB Coach Body Kit
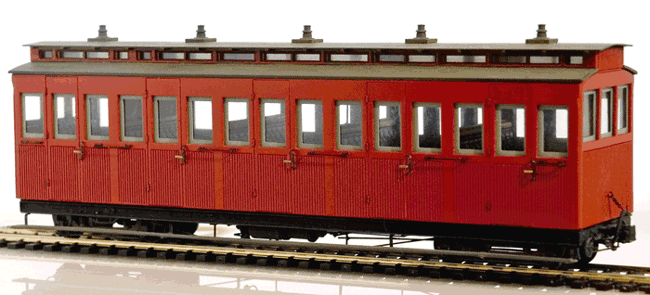
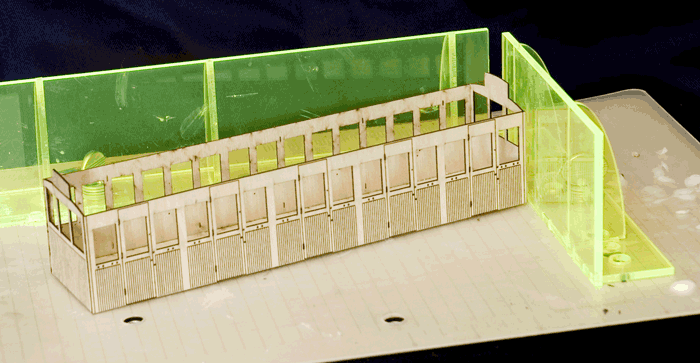
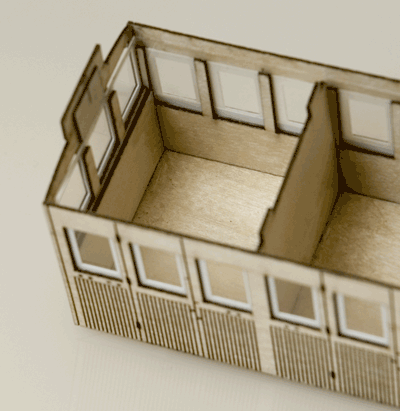
The NBB Coach Body Kit includes all the parts to enable you to easily construct the NBB Coach body as depicted above. The kit includes glazing but does not include door handles, hand rails, couplings, bogies, wheels, underframe, paint or transfers.
The kit is made from high quality marine ply from Finland as well as a small number of parts made from styrene.
As for all kits please check the orientation and fit of every component before gluing. Although the components are laser cut you may occasionally have to carefully use a file to make sure the they fit together easily. Do not force them to fit. If you accidently break, damage or distort a component Brunel Models will replace it at no cost.
The kit consists of a distinct number of separate assemblies.
- An outer or outside body of the coach.
- An inner body assembly.
- A roof assembly.
- Droplights and glazing.
The steps required to built the coach builds each of these assemblies in turn and combines them as construction proceeds. The assemblies can then be separated to allow them to be painted.
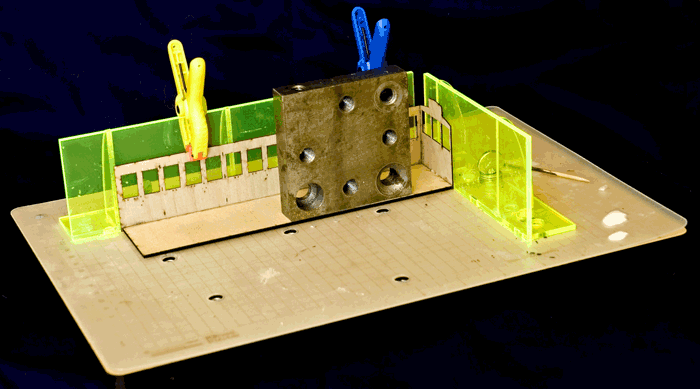
It is important to make sure that each assemby is square and that it is built on a flat surface. To this end you can use the Brunel Models ModelMate, Fence and Surface Protector or similar arrangements. Clamps (available from Brunel Hobbies), "Blu Tack" and heavy weights are also useful as you will see in the assembly instructions.
The recommended glue to use is an Aliphatic Resin based PVA glue such as Yella Tera or Titebond (both available from Brunel Hobbies). These glues set rapidly and are sandable. A toothpick can be used to sparingly apply the glue.
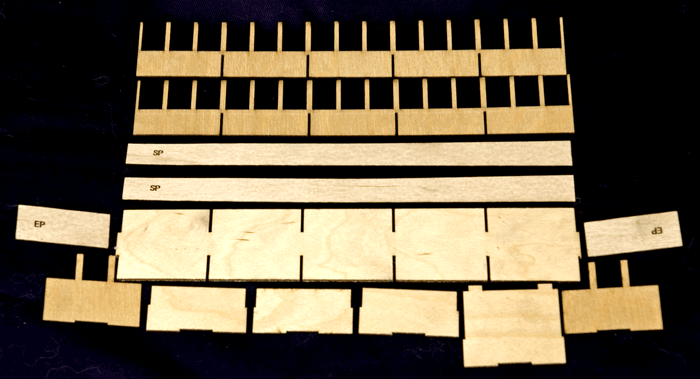
Step 1.
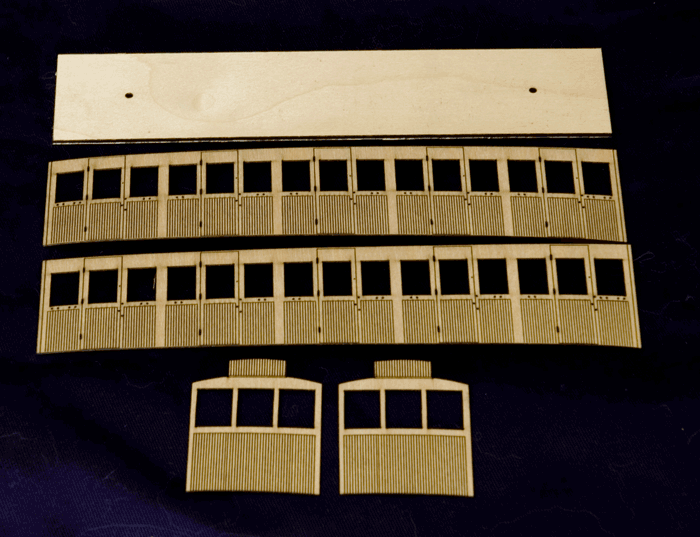
The first step is to build the ouside body of the coach with the components shown above. These consist of two ends (identical), two sides (identical) and a 2mm ply floor with two holes in it.

One side of the coach is glued to the floor as shown above. Make sure that the coach side is centred on the floor and the assembly is held square while the glue dries.
Step 2.
Next glue one coach end on the floor and the side as shown. Note that the end fits inside the side of the coach. Then repeat with the other side. As before make sure that the assembly is held square and the foor flat (the weight shown is used to do this).
Step 3.
Finally glue the remaing side to the floor and the two ends as shown. As before make sure that the assembly is held square and the foor flat (the weights shown are used to assist in doing this).
The outside coach body should look like this.
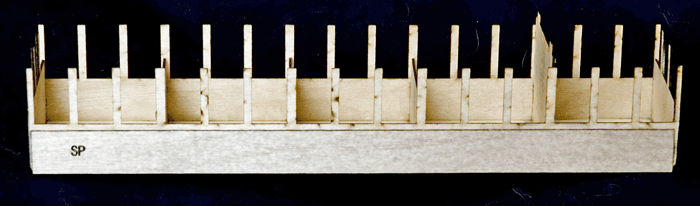
Step 4.
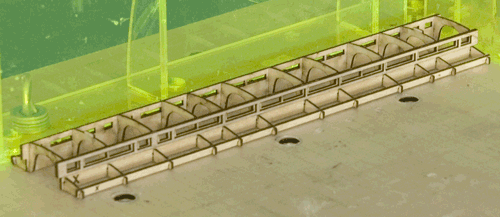
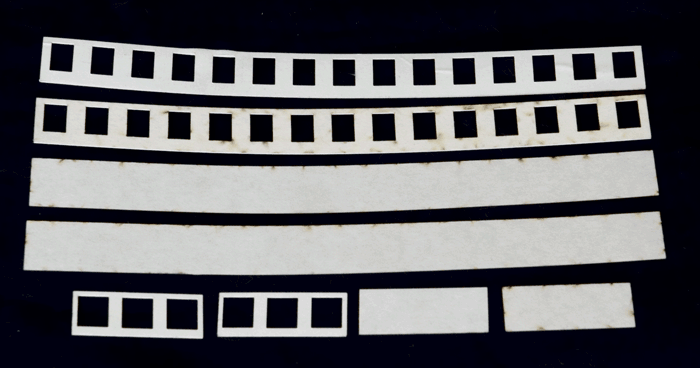
The outside coach body should now be put aside and the inside assembly now constructed. The components required are shown below.
These consist of from the top of the photo down; two sides (now with a top continuous strip), two side packing panels (marked SP), a floor with slots to fit the partitions into, two end packing panels (marked EP), two end panels (with two thin prongs upwards), three small partitions and one large partition.
Note that the uprights of the two inside sides have been joined together along the top to minimize the possibility of breakage.
The three small partitions and the large partition should be fitted into the slots in the floor and into the slots in one of the sides as shown. The assembly should be checked for squareness and that the side base is level with the base of the floor.
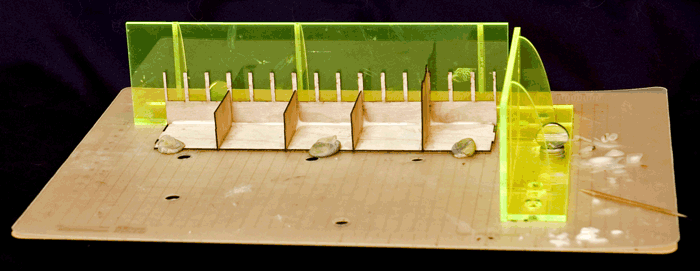
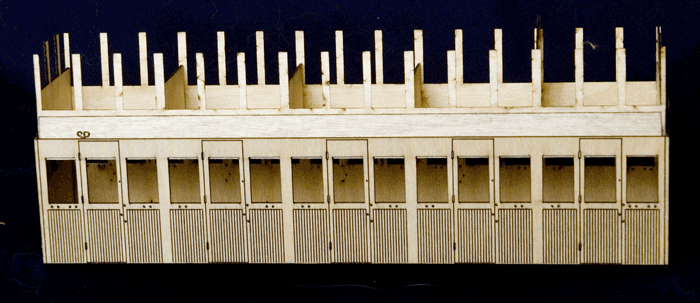
Step 5.
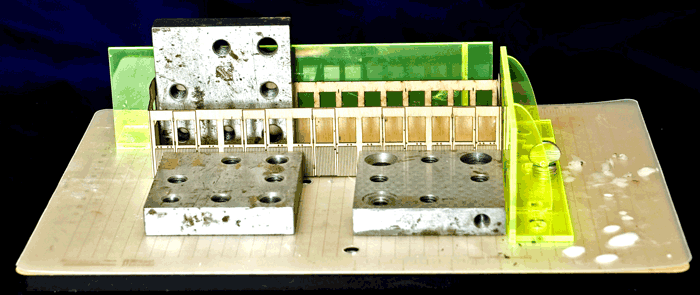
Next glue the remaining side to the floor and glue the two ends as shown. The end packing panels can now be glued in place and then the side packing panels making sure that the bottom of the packing panels is level with the floor of the assembly. The assembly should now look like this.
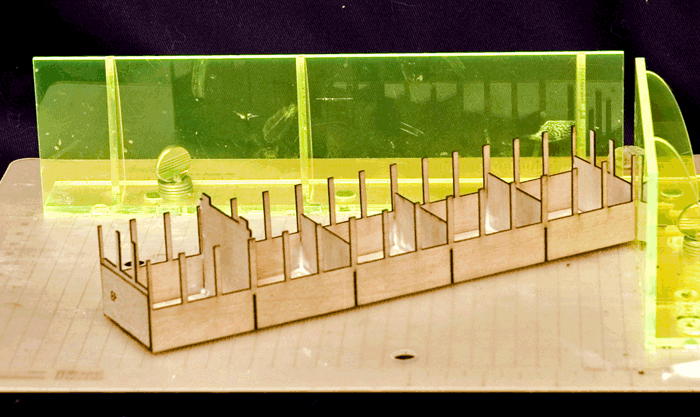
Step 6.
The next step is to check that the inside assembly slides easily but firmly into the coach body constructed in steps 1 to 3. You may need to sand down the end packers slightly to make sure that this is so. It would also be prudent to file the edges of the base of the assembly and in particular the corners to make sure that the assembly fits down flush against the floor of the outer coach body. The inner assembly can be removed carefully by poking a drill bit or a piece of stiff wire through the holes in the coach body base. It is important the that fit is firm and snug as the packers will support the droplights and the glazing at the correct height.
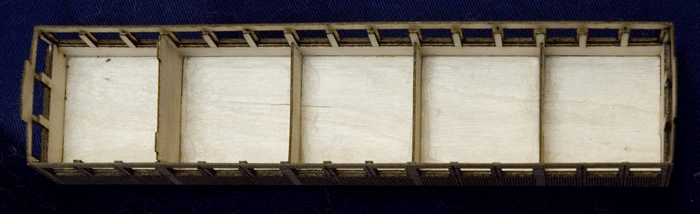
The inside of the coach should look like this.
Step 7.
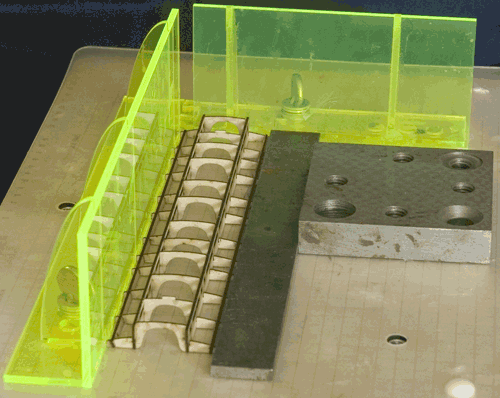
The next step is to commence assembly of the roof. The components required are shown below.
There are two overlays one for each side of clerestory roof windows. These need to be glued in place before the side roof panels are glued in place.
Some of the components of the roof are shown below.

These consist of from the top of the photo down; two clearestory sides, and the two thin struts for the outer edges of the roof assembly. The roof formers can be clarly seen in the photo below and overlays for each side of the clerestory roof windows are also now included.
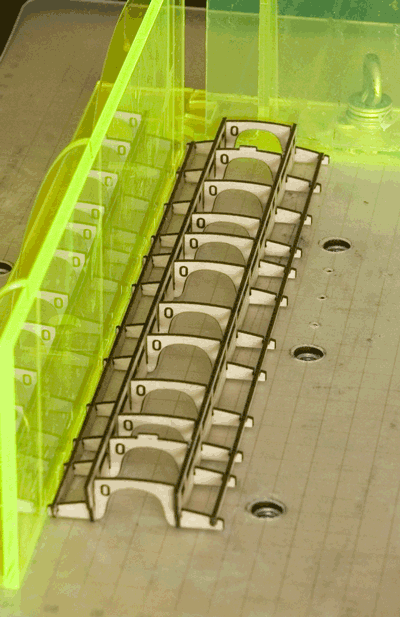
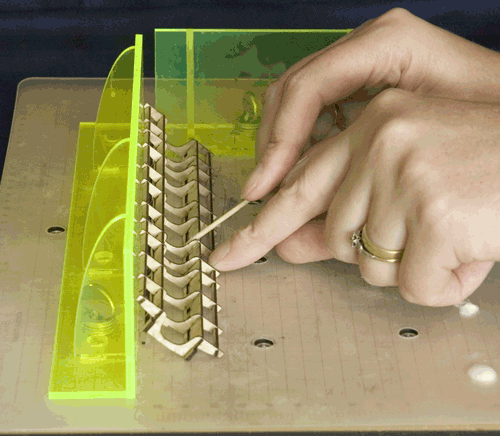
Carefully assemble the roof components. File slots if necessary for an easy fit. Make sure that all the roof formers are orientated the same way - they are marked with an "O" to facilitate this. Note that the second frame in from each end has a tab in the centre of frame to enable the roof to be correctly fitted. Each of the logitudinal struts have an "X" marked on them to facilitate making sure that all the struts are orientated correctly (the "X"s should all be at the same end but not necessarily all facing the same way). Glue the two clerestory window overlays in position.
The assembly from the side - note the clerestory side window overlay glued into position.
Make sure that the the struts are all slotted onto the roof formers so that they are flush with the top of each roof former and make sure that the assembly is square and then glue as shown below. A good way of doing this is to use a toothpick dipped in the glue as required.
Step 8.
The roof panels should now be glued into place. The components required are shown below.
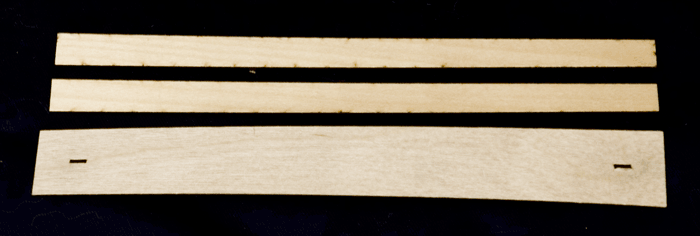
These consist of from the top of the photo down; two side panels (0.6mm ply) and a top panel (0.4mm ply) with two slots in it. These slots are now parallel with the roof ends to match the tags on the two roof formers supplied.
The side panels have a number of laser cut lines on their underside to facilitate fitting them to the slight curve of the side roof panels. To make sure they follow the curve of the roof it is best to glue either the inner or outer edges first and then when dry glue the opposite edge. Make sure that the side panel is centred on the roof assembly. Clamp to the roof assembly as firmly as possible as you proceed as shown.
Glue the remaining side roof panel in place as shown.
Finally glue the centre roof panel in place gluing one side and clamping it until the glue sets and then the other side. There are two slots in the roof that match the tabs in the two roof formers to facilitate centering the roof correctly on the roof assembly. The tabs will be a fairly tight fit and may need to be eased slighly with a file. File the tabs sticking up from the centre roof down to match the roof surface.
Step 9.
There now remain two small oblong panels of ply that are intended to glue at each end of the inside of the coach to simulate the wooden back of the seats (see photo below).
Step 10.
The droplights and glazing can now be slid into place and checked for fit. The components required are shown below.
These consist of from the top of the photo down; two droplight side panels (0.25mm styrene), two end droplight side panels (0.25mm styrene), two side glazing strips and two end glazing strips. Note that the glazing is covered in protective tape and this should be removed.
The glazing and droplights fit down between the walls of the coach and the upright struts along the sides of the inside assembly. They should rest on the packing strips. You may need to trim them slightly to ensure a good fit. The kit is designed to enable the droplights and glazing to be removed to allow for painting of the coach body. The droplights can be painted separately.
In the kit you will also find two strips of opaque plastic which you can use to simulate the glazing in clearstory roof. Cut them to the right length and glue in place in the roof after painting.
The three vertical slots beside each door are for door hinges. Cut a snmall piece of styrene or wood and insert in the slot, glue and file down when dry to about a mm above the surface of the coach body. The holes in the sides are for the door handles, and hand rails. Suitable lost wax door handles are available from CRT Kits in the UK item LW22 (£2.60 for 10 plus postage to Australia).
The coach body is now complete.